Do’s and Don’ts of Your First Trade Show: Part II – Tips for Your First Art Fair
Back in last November, our Vice President, Jess Mader, and our client, Brainy Ball, attended the Chicago Toy and Game Week together to help promote the new game, and from their adventure, gave us a bunch of great Do’s and Don’ts for your first trade show.
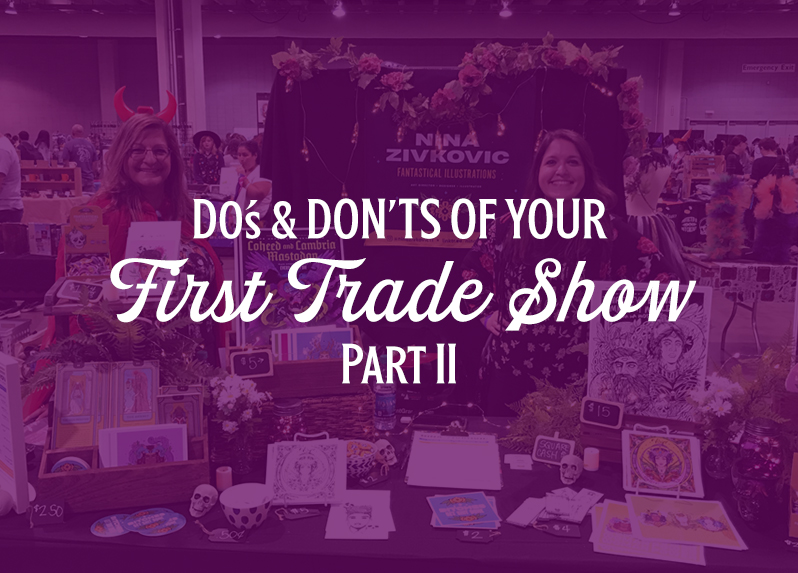
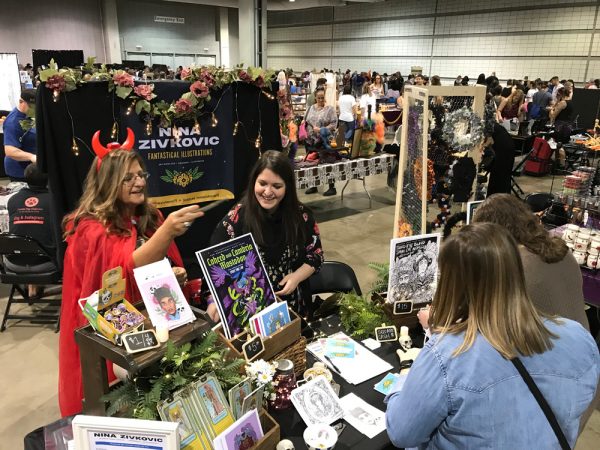
Taking that advice, our Art Director, Nina Zivkovic, recently participated in her first art fair, the 2019 Bitchcraft Fair at the David L. Lawrence Convention Center (DLCC) on September 22nd. After years of illustrating, she finally wanted to take the next step and sell her artwork – and first place she though to start? A trade show/fair! She definitely did the “Do’s” and thankfully stayed away from the “Don’ts”, and it showed in her booth traffic!
In Part II, we’ll cover even more experience from Nina’s fair, that’ll help novice potential vendors feel a little more at ease, and even inspire some veterans, too!
First, and before anything else, if you’re literally physically able to: stand as much as you can during the trade show.
In Part I, we had “Don’t: Look Unapproachable” as one of our top “Don’ts”, and it was incredibly true at the fair. Many of the booths and vendors who didn’t get as much traffic, were sitting and quiet, even some on their phones. But more on this later!
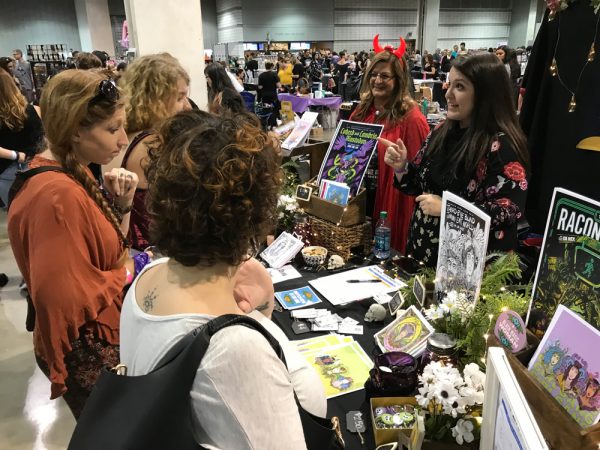
So you want to sell your art at a fair…
But where? And how do you know what’s the best one to start at?
At first, go with what you know. Big name fairs and trade shows, like the Home and Garden Show , Steel City Comic Con, and Handmade Arcade are great ways to look for requirements, for samples and examples, and all around inspiration. Most of which are held at large Convention Center’s like David L. Lawrence Convention Center or Monroeville Convention Center – just search through their calendars for upcoming shows!
But if you’re new at it, like Nina, sometimes that can be a little intimidating. Another great place to look? Facebook Events! You can check out events in the category that you’re looking for – i.e. Arts & Entertainment. Sometimes it’s good to venture outside of your niche to open up new avenues, but for your first show, we recommend applying for one in your lane. And, that’s how Nina found Bitchcraft. After looking through many upcoming events – a lot of which were already filled and closed applications, she found the Pittsburgh Fair that felt right up her illustration-style lane – witchy, creative, and fun!
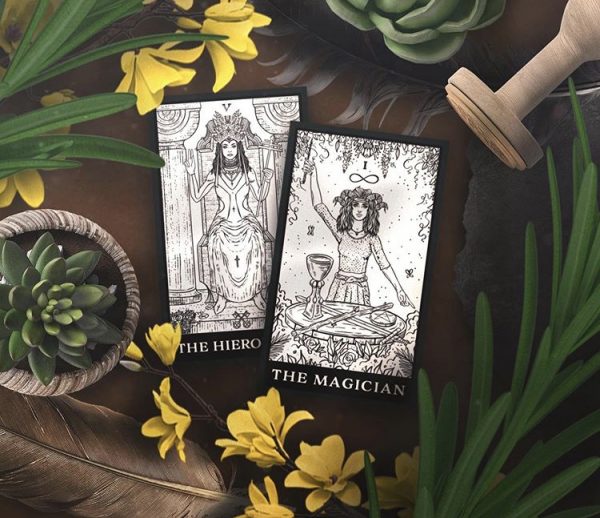
You found the right trade show that you’d like to show at… now what?
A lot of fairs and trade shows have easy to find applications on their websites. Some are more extensive and require more information, insurance, licenses, etc., others don’t. A lot of them also have wonderful lists that let you know vital details before you sign up. Make sure to read everything!
Before the application, also make sure you confirm pricing for the actual booth space and number of days it includes – as we mentioned in our first post, some have early bird registration deals – take advantage of those if you can. While researching, Nina found some that were free (much smaller events with a few artists/vendors) and others that were $1,000+. There are a lot of other costs associated with being a vendor (we’ll go into that more, too!), so make sure to read over the page for all details, and ask their support team any questions on fees, etc. It’s always better to ask than to just hope for the best.
For Bitchcraft, it was a fairly simple application that required basic info like name, email, portfolio, and other basic get-to-know-before-being-accepted info. The show was listed for September 22nd, and the applications were still open in July when Nina applied.
She only had to wait a couple days until she heard back from the fair team on her acceptance as a vendor!
Yay! Acceptance to the Trade Show! Wait… You Need A License?! I’m just 1 person!
Again, don’t forget or skip over the costs. And, not only the costs to the fair, but the costs what your booth set-up, your products, etc.
Back at the end of July, when Nina applied and was accepted, she also attended the Making Midwest Conference and Creative Business School Workshop. It was literally perfect timing because one of the Creative Business School Workshop Speakers talks was “Financial Wellness: Five Ways to Boost Yours” from Elaine Grogan Luttrull of Minerva Financial Arts. In the Workshop, Elaine covered a variety of topics all geared towards creatives and their financials! It was when she began discussing trade shows, fairs, and sales taxes that Nina knew it was meant to be! Sometimes you just don’t think about it, until someone says it! And, thankfully, Elaine did!
Make sure you check with your fair team if they are covered under a vendors license or if the fair itself/location has all the right licenses. Not sure if you need it? Just ask! That’s what Nina did. And, she was all set on that end. But, even though it was Nina’s first time selling physical art, and she wasn’t sure if she’d like doing it, she made sure to reach out to her Certified Public Accountant (CPA) on best steps to ensure she’d be all set license-wise, and anything else she’d need to set-up prior.
With her local CPA, they signed her up for a PA’s Sales Tax License (Free!) And, albeit a long application, with her CPA at her side (via phone), it was fairly painless. Don’t be afraid to ask your CPA to fill it out with you. They filled it out together over the phone to make sure everything was done correctly. And, it was! Because Nina received her Sales Tax License! Huzzah! There are a bunch more levels that are involved in making sure you’re all set to sell depending on your size of business, etc. We highly recommend reaching out to your accountant and any specialized lawyers that you might need.
HOW MUCH did you say?! It DOESN’T include (x)!? Money!? Huh?!
Alright, back to the cash. So you paid for your booth & space at the fair for however many days, and you think you’re done. You’ve got months. It’ll be fine. So much time…
… Well, take it from Nina… start early. We even recommended in our first post on trade shows “Do’s and Don’ts”, but *maybe* Nina didn’t give herself as much time as she should have.
So let’s just reiterate that line from Part 1 again for the ones who really need it: GIVE YOURSELF MORE TIME THAN YOU THINK YOU NEED TO GATHER MATERIALS. It’s not only beneficial for your own sanity and also to make sure you don’t forget anything, it’s also very financially smart to do so, too. Because, for the most part, one of the top goals to being a vendor, is to sell something and make money.
Remember earlier when we said to read details? Well, this is where it’s super key to do so. Maybe you skipped that part, but when you’re starting to plan and buy items, it’s very beneficial to know what is included and what’s not. And, confirm the details again with the fair organizers, just to be safe!
Things that you’d think would be included, but might not be:
- Table(s) & chair(s): Not all fairs actually provide a table and chair for your ‘booth’. And, some fairs only include one table and one chair, and you have to purchase additional ones. Bitchcraft had a cut-off date of September 1st to buy any additional tables. They included one 8-ft table and two chairs.
- Table cloths: Some fairs have generic cloths on the tables, but most don’t. There are affordable options in most stores. Nina purchased her’s on Amazon (make sure you double-check the table-size!)
- Backdrop/Divider: When Nina was looking through the fair’s previous shows, she saw that some of the shows had dividers in-between the booths, others didn’t. Thankfully she made sure, and found that the fair did not provide dividers. Rather than having her display drowned out by the vendor that would be behind her, she ordered a super simple backdrop stand on Amazon. Remember when we said “you need more time than you think?” Well, when Nina originally ordered this (less than a week before the show), the first time the package was damaged and Amazon returned it before it even arrived! As soon as Nina got the message, she made sure to reorder it! Thankfully, it arrived in time, but it was a close call! Phew!
- Electricity: You might think you’ll be able to plug in your charger anywhere or maybe you have lights or other electric-dependent items… well… you might have to pay for that. The rental fee starts at $135 at the DLCC and goes up from there. Nina opted for battery-based chargers and battery-based lights to avoid the rental fee.
- Wi-Fi: Another paying fee that you might not expect. If you don’t have unlimited data, make sure you’re aware of this beforehand. And, try to restrict your phone use just to credit card swiping (if that’s what you’ll need Wi-Fi for). Plus, don’t forget about social media promos during the fair, too!
- If you think something should obviously be included for free or with the price, it’s best to check. Most fair organizers will send a final detail email to you prior to the fair that’ll cover these things, but it’s best if you don’t wait, and you ask all the questions, even the seemingly obvious ones!
After you find out what is and what isn’t included in your particular fair/show, next up – getting everything else! You’ll need to beautify and brand your stand, plus get all your products printed and shipped (if you haven’t done it already)!
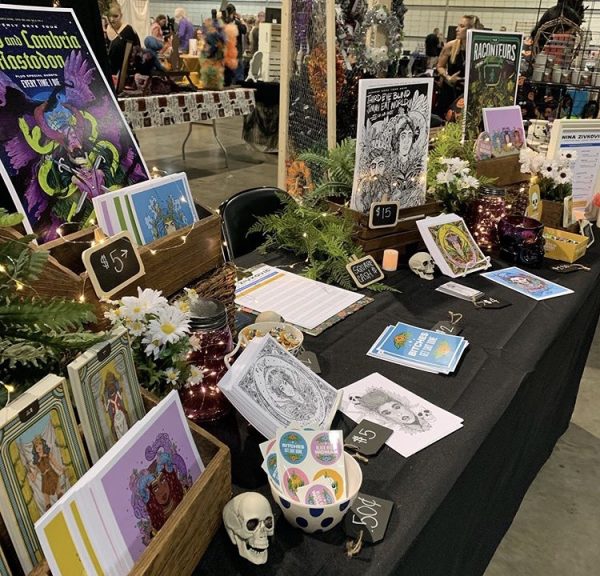
Local/Store Recommendations:
- Local Printers – cuts out the shipping cost! Plus, hands on and in-person service that’s very helpful when your’e running short on time. Copies at Carson did a fantastic job with all the art prints. Nina had low-quantities (some pieces she only printed 5 copies), and had a large amount of variations – she printed 12 color zodiac prints, 12 black and white zodiac prints, 20 other various portrait prints, with different sizes and styles, and they came out great, organized and on time!
- Michaels: They almost always have a great sale going on – or are about it – so make sure to sign up for they rewards and newsletter so you can plan out your trip. Nina got a ton of great display props like flowers, battery-lights, skulls (halloween-time!), mason jars, and more.
- Target: Basically next door to Michaels in Pittsburgh’s Waterfront, whatever Nina didn’t find at Michaels (or didn’t already have in her own collection), she grabbed at Target. Like affordable freebies (the fair hosted a Trick-or-Treat for freebies; but we also recommend having some sort of affordable takeaway); desk organizers to hold art prints, and more. She also bought a black twin bed sheet to use a backdrop for her backdrop holder!
- Charming Charlie: Unfortunately, Charming Charlie is closing all of their stores. On the plus side, while the Waterfront location was still open and liquidating all of their items, Nina was able to grab perfect trade show ready items (like a dish holder that doubled ask an art-print holder, and a frame that was used to show sales, that Nina used as a price-sheet at both ends of her display!).
Online sources:
(due to timing, Nina had to do rush production and shipping on many of these. So, remember, get your products and booth planned ahead of time!)
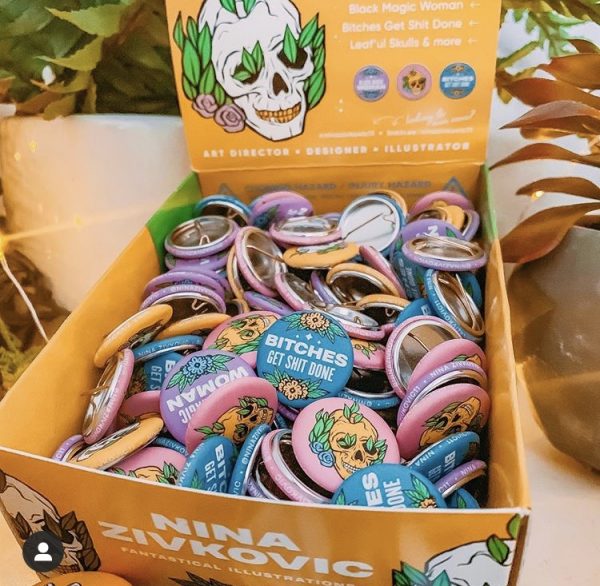
- Pure Buttons: Nina highly recommends using Pure Buttons! She was able to make her own display box for buttons & use soft-touch. The soft-touch was a fantastic way to entice fair-goers to buy products. Almost everyone was sold as soon as they touched them! (another great reason why “touch” in the 5-senses is important!) They also have metallic buttons, magnets, keychains and more!
- Moo Printing: Nina used Moo for specialized printing at a lower cost and limited quantities for her various tarot cards and stickers.
- Stickermule: A great resource for stickers, coasters, as well as another option for buttons.
- Next Day Flyers: Need quick stickers? Or other quick prints?
- Next Day Display: Instead of getting a fully printed table-cloth, Nina opted for a Table-Runner, which she’s happy she did. (more on that in the next section).
Don’t Forget! Trade Show Promo! Pre-Promo! and Promo and Post-Promo!
After you’re accepted and you have your licensing figured out (if applicable), and while you’re prepping your products and booth, don’t forget to let people know that you’re going to be at the fair! We’re not all Beyonce’s – it doesn’t always work to drop an album the day of and still be able to sell.
Make a social media post that you’ve been accepted. Send a email to your current subscribers. If the fair is a few months away, you don’t have to get too heavy, but still add it to the footer of your posts, remind people about it without shoving it in their faces too much. Be genuine, but be smart. Tag the right people – like the fair itself, because they’ll usually like and/or repost your posts, too (it helps them!).
As soon as you know the booth number, make sure to add that to all your posts, as well. If you’re able to do a special subscriber or follower promo (like “free button when you stop down at our booth and purchase an item over $5! Just show this email!”) to help engage with your following and promote the event, do it! Get people excited!
We’ll mention this a couple times here, but don’t forget to post the day you’re at the fair. Live videos and/or Stories are great to share the experience in a more exclusive way. And, post about it afterward, especially if you forgot or didn’t post about it before or during – you hopefully gained more followers because of the show, remind them who you are! Nina posted a photo of the buttons she did as well as her booth and vendor neighbor to make sure people remembered who they followed and why!
Stay tuned for our Do’s and Don’ts Part III, with even more tips and tricks for your first art fair or trade show!
Going to your first trade show and feel overwhelmed by how much planning and strategizing goes into it? Let us help relieve your stress. Our design team at ocreations loves to prepare clients for trade shows – especially their first one ever! Check out some other tradeshow materials we’ve worked on. Let’s get creative. Let’s get your (trade)show on the road!
